[Vue] 디렉티브로 v-switch 구현하기
in Devlog on Js, javascript, Vue, Vuejs, Vue.js, Directive, Custom
Custom Directive
개요
Vue에는 v-if라는 디렉티브(Directive)가 있습니다.
이 디렉티브는 값에 따라서 요소를 보이거나, 보이지 않게 해줍니다. 간편하고 쓰기도 편한 디렉티브이긴 하지만 조건이 많아지면 많아질 수록 관리는 힘들게 됩니다.
그리고 우리는 조건이 많아지면 switch라는 해결방안이 있지만, vue에서는 지원을 하지 않기 떄문에 직접 구현해보며 공부하도록 하겠습니다.
디렉티브
디렉티브란, v-model, v-if, v-binding과 같이 요소에 값을 주거나, 요소를 제어하는 등의 역할을 합니다.
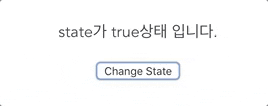
v-if 디렉티브를 적용한 모습
<template>
  <div id="app">
    <p v-if="state">
      state가 true상태 입니다.
    </p>
    <p v-else>
      state가 false상태 입니다.
    </p>
    <button @click="state = !state">Change State</button>
  </div>
</template>

<script>
export default {
  data() {
    return {
      state: true
    }
  },
}
</script>
v-if
편리하고 사용하기 좋은 기능임은 틀림이 없지만, vue에서는 기본적으로 v-if를 지원하지만 switch문은 지원하지 않습니다.
그래서 다음과 같이 조건이 많은 웹에서는 더욱 복잡해집니다.
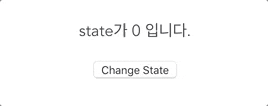
v-if를 마구 적용한 모습
<template>
  <div id="app">
    <p v-if="state == 0">
      state가 0 입니다.
    </p>
    <p v-else-if="state == 1">
      state가 임요환 입니다.
    </p>
    <p v-else-if="state == 2">
      state가 홍진호 입니다.
    </p>
    <p v-else-if="state == 3">
      state가 벙커 입니다.
    </p>
    <p v-else-if="state == 4">
      state가 4 입니다.
    </p>
    <button @click="state = (state+1) % 5">Change State</button>
  </div>
</template>

<script>
export default {
  data() {
    return {
      state: 0
    }
  },
}
</script>
Custom Directive
Vue에서 switch문을 사용하기 위해서는 Custom Directive(사용자 지정 디렉티브)를 설정해줘야 할 필요가 있습니다.
사용자 지정 디렉티브는 다음과 같이 지정해 줄 수 있습니다.
// 전역 사용자 정의 디렉티브 v-focus 등록
Vue.directive('focus', {
  // 바인딩 된 엘리먼트가 DOM에 삽입되었을 때...
  inserted: function (el) {
    // 엘리먼트에 포커스를 줍니다
    el.focus()
  }
})
<input v-focus type="input">를 사용 하면 포커스됩니다
이 사용자 지정 디렉티브를 사용해서 v-switch를 구현하겠습니다.
구현
1. template 설정
<div v-switch="condition">
  <div v-case="1">
    컨디션이 1입니다.
  </div>
  <div v-case="2">
    컨디션이 2입니다.
  </div>
</div>

<button @click="condition = (condition+1) % 3">Change Condition!</button>
원하는 결과값은 버튼을 클릭하면 그에 맞춰 DOM의 display가 none으로 변하는 것 입니다.
2. Directive 설정
Vue.prototype.$bus = new Vue()
Vue.prototype.$save = {}
Vue.prototype.$save.switchs = []

let caseIndexs = 0
let switchIndexs = 0

Vue.directive('switch', {
    inserted(el, binding, { children }) {
        let myIndex = switchIndexs++
        Vue.prototype.$save.switchs[myIndex] = []

        children.forEach((childrenVNode) => {
            let directiveCase = childrenVNode.data.directives.find(x => x.name === 'case')

            Vue.prototype.$save.switchs[myIndex].push(`vCase${childrenVNode.vCaseIndex}`)
            Vue.prototype.$bus.$emit(`vCase${childrenVNode.vCaseIndex}`, directiveCase.value === binding.value)
        })

        el.index = myIndex
    },
    update(el, binding, { children }) {
        children.forEach((childrenVNode, index) => {
            let directiveCase = childrenVNode.data.directives.find(x => x.name === 'case')

            Vue.prototype.$bus.$emit(Vue.prototype.$save.switchs[el.index][index], directiveCase.value === binding.value)
        })
    }
})

Vue.directive('case', {
    inserted(el, binding, vnode) {
        el.style.display = 'none'

        vnode.vCaseIndex = caseIndexs++

        Vue.prototype.$bus.$on(`vCase${vnode.vCaseIndex}`, (type) => {
            if (type) {
                el.removeAttribute('style')
            } else {
                el.style.display = 'none'
            }
        })
    }
})
switch와 case를 사용자 지정 디렉티브에 등록해줍니다
다음과 같은 코드를 Vue.mount()하기 전에 실행하도록 추가해줍니다.
그럼 이제 방금과 같은 v-if가 많은 template도 이제는 v-switch로 대체가 가능합니다!
<template>
  <div id="app">
    <div v-swich="state">
      <p v-case="0">
        state가 0 입니다.
      </p>
      <p v-case="1">
        state가 임요환 입니다.
      </p>
      <p v-case="2">
        state가 홍진호 입니다.
      </p>
      <p v-case="3">
        state가 벙커 입니다.
      </p>
      <p v-case="4">
        state가 4 입니다.
      </p>
    </div>
    <button @click="state = (state+1) % 5">Change State</button>
  </div>
</template>
어떤가요? 이제 좀더 보기 쉬워진 것 같나요?
끝으로
처음으로 custom directive를 구현해봐서 미숙한 점이 많은 것 같다. 다음에는 더 나은 코드를 쓸 수 있을 것 같다.
Vue $on과 $emit을 사용해서 구현했지만 사용하지 않아도 구현할 수 있는 방법이 있을 것 같다.
지금은 그저 DOM의 스타일만을 조작해서 렌더링 하고 있지만 성능상의 이유도 그렇고 나중에 다시 구현할 때는 다른 방식으로 코드를 짜고싶다.